# User manual
- Start Shizuku
- FAQ
- Start via wireless debugging: keeps showing "Searching for pairing service"
- Start via wireless debugging: immediately fail after tapping "Enter pairing code"
- Start via wireless debugging/Start by connecting to a computer: the permission of adb is limited
- Start via wireless debugging/Start by connecting to a computer: Shizuku randomly stops
- Start via root: cannot start on boot
# Start Shizuku
Shizuku supports startup in the following three ways.
If you are using GrapheneOS
System settings - "Security" - "Secure app spawning" may need to be disabled.
# Start with root
For rooted devices, just start directly.
# Start via wireless debugging
Starting with wireless debugging works on Android 11 or above. This startup method does not require a connection to a computer. Due to system limitations, the startup steps need to be performed again after each reboot.
# Enable Wireless debugging
- Search the web for how to enable "Developer options" for your device model
- Enable "Developer options" and "USB Debugging"
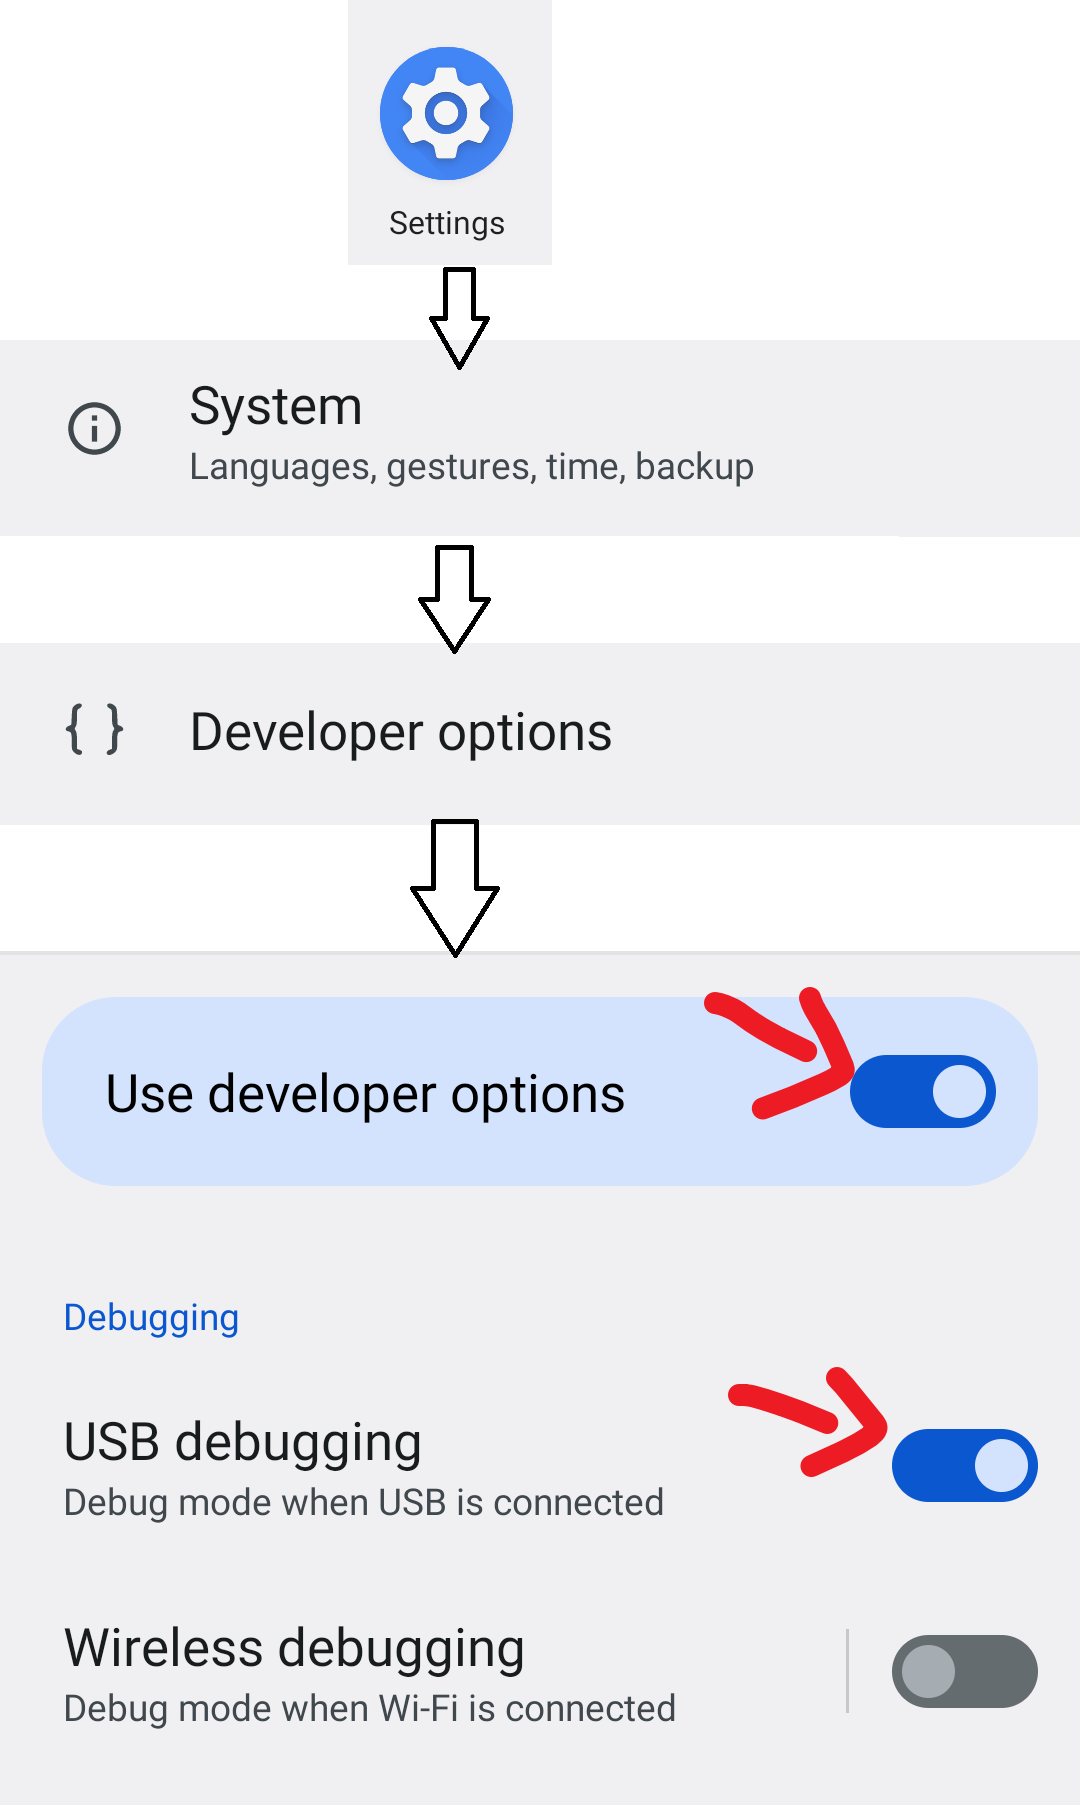
- Enter "Wireless debugging"
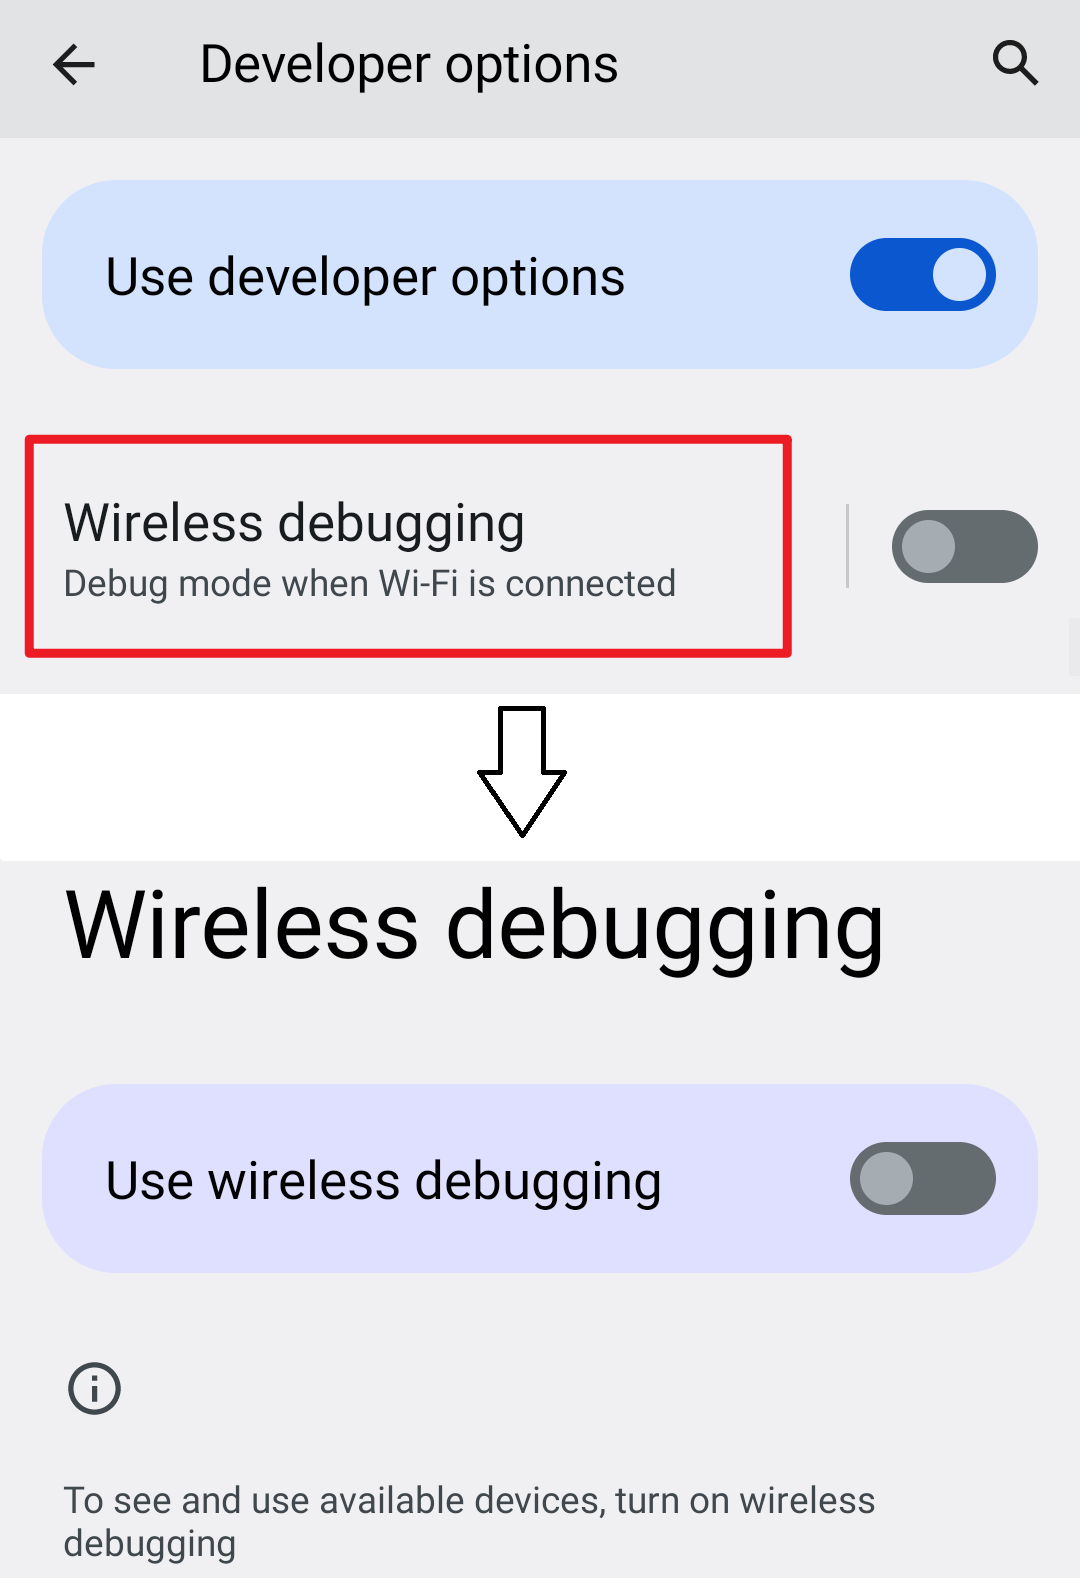
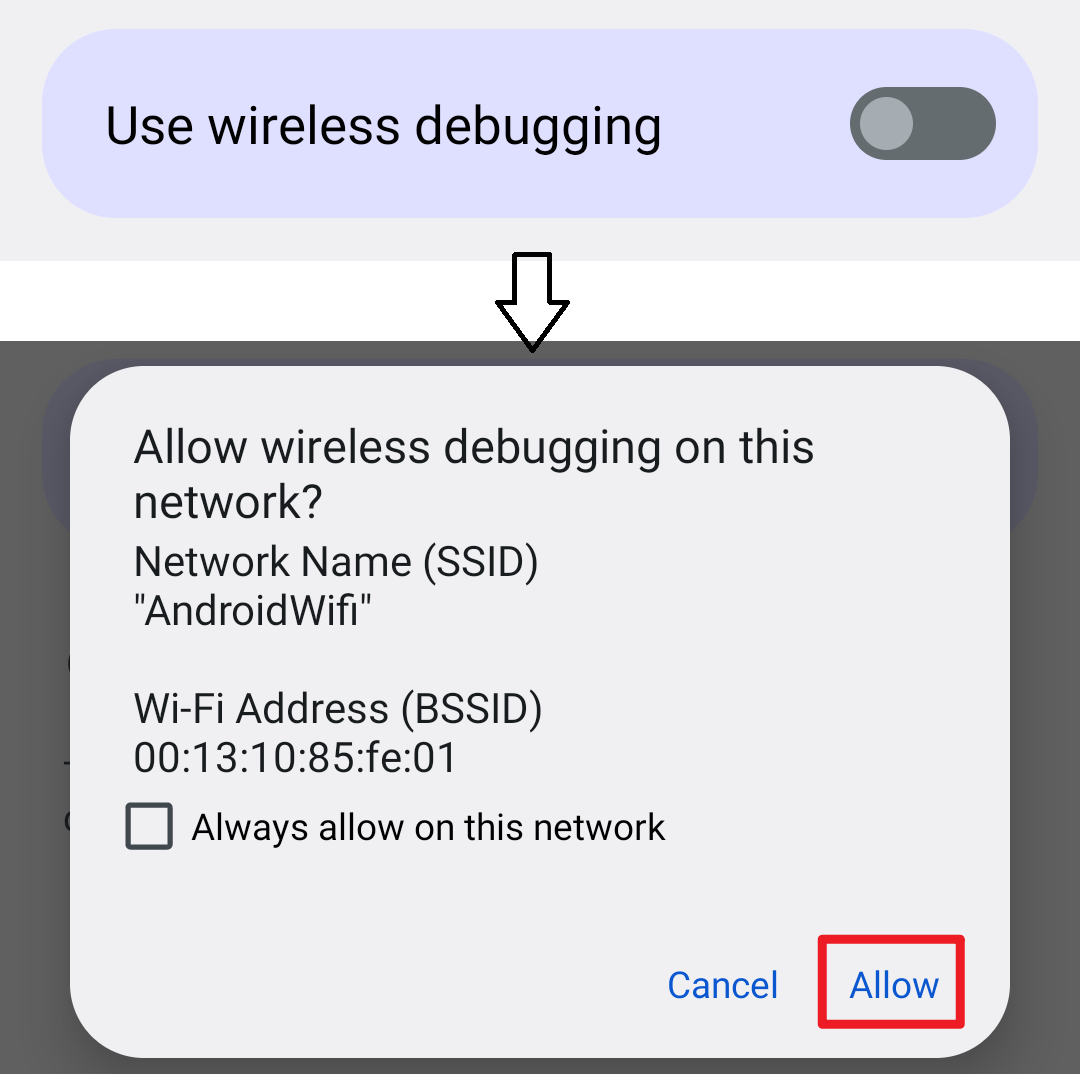
- Enable "Wireless debugging"
# Pairing (only needs once)
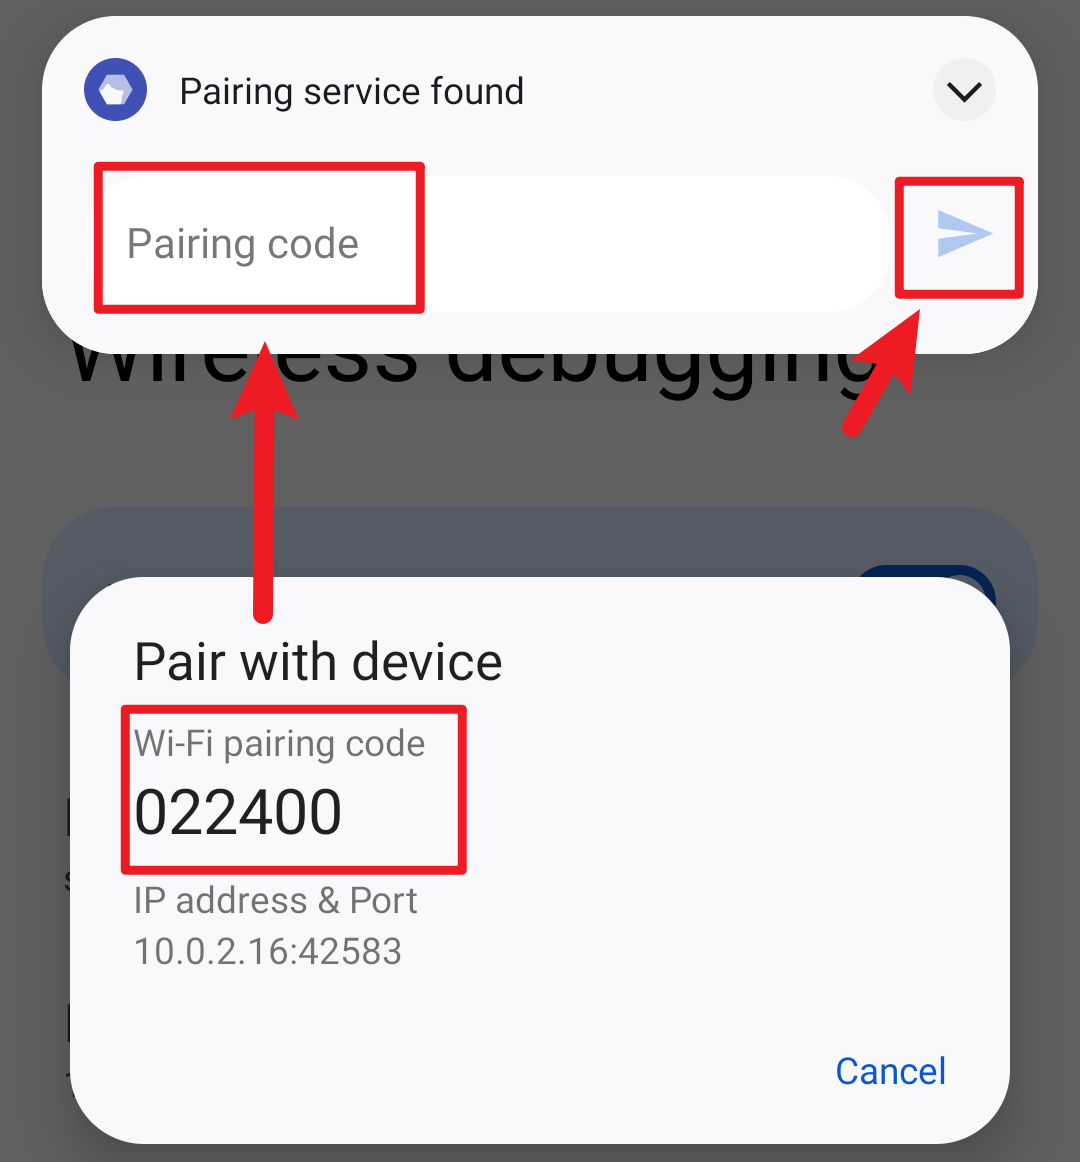
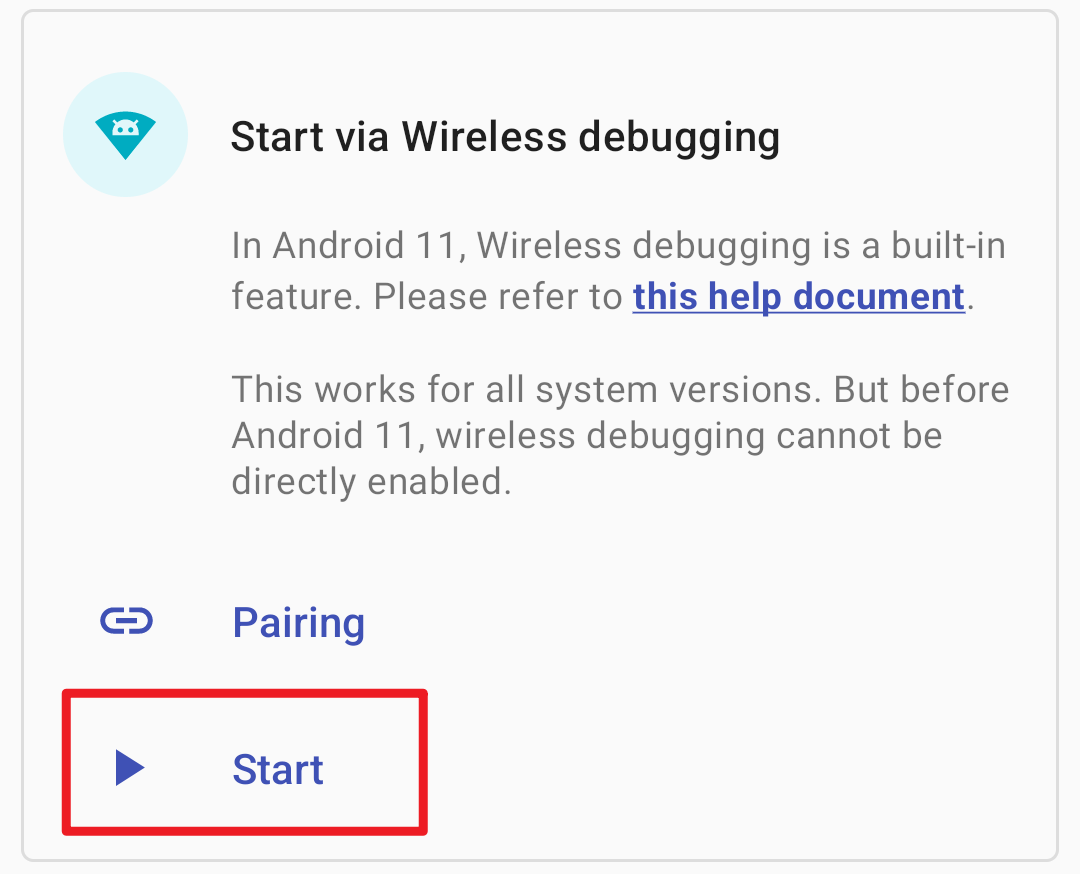
- Start pairing in Shizuku
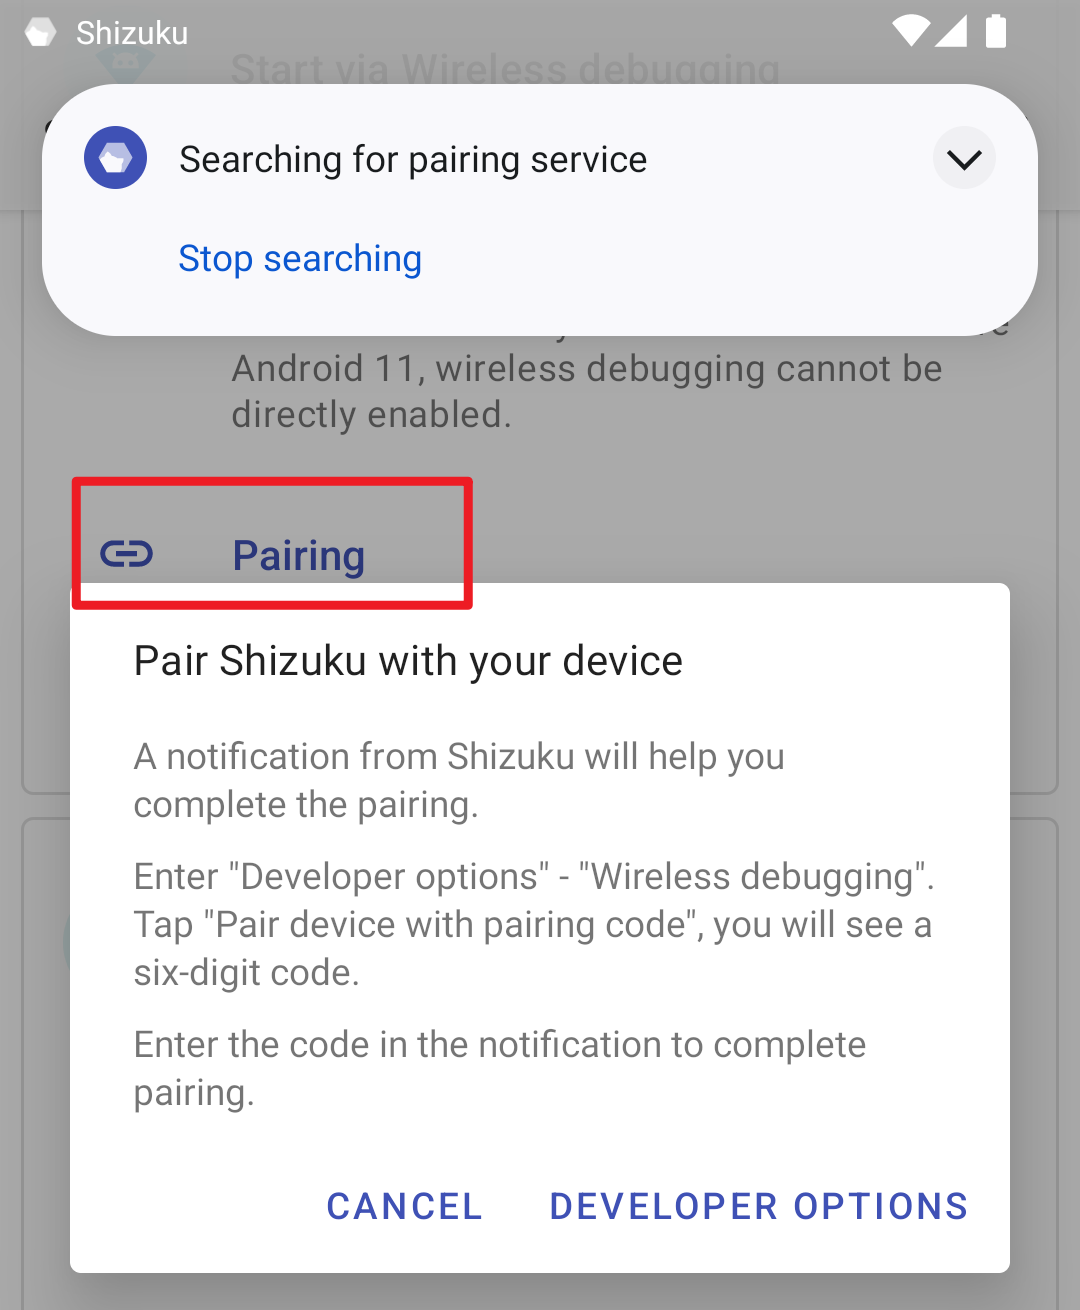
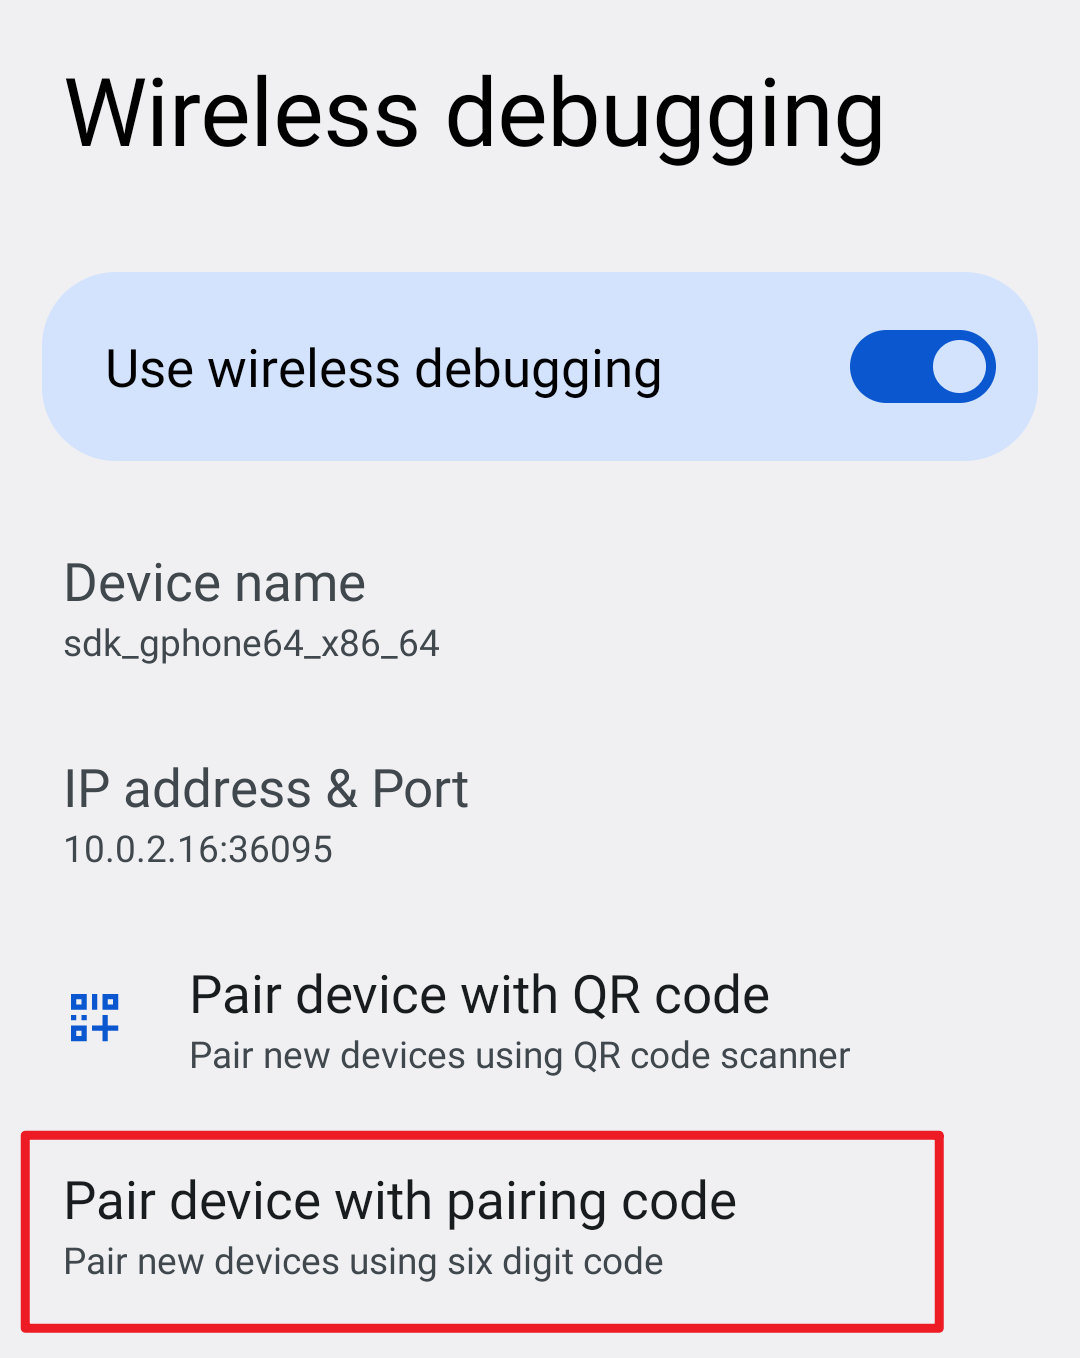
- Enable Wireless debugging
- Tap "Pair device with pairing code" in "Wireless debugging"
- Enter pairing code in Shizuku's notificaiton
# Start Shizuku
If it does not start, try disabling and enabling wireless debugging.
# Start by connecting to a computer
This boot method works on unrooted devices running Android 10 and below. Unfortunately, this startup method requires a computer. Due to system limitations, the boot steps need to be performed again after each reboot.
# What is adb?
Android Debug Bridge (adb) is a versatile command-line tool that lets you communicate with a device. The adb command facilitates a variety of device actions, such as installing and debugging apps, and it provides access to a Unix shell that you Can use to run a variety of commands on a device.
See Android Developer (opens new window) for more information.
# Install adb
Download "SDK Platform Tools" provided by Google and extract it to any folder
Open the folder, right click to select
- Windows 10: Open PowerShell windows here (hold down Shift to show this option)
- Windows 7: Open command window here (hold down Shift to show this option)
- Mac or Linux: Open Terminal
Enter
adb, if success, you can see a long list of content instead of the prompt not finding adb.
TIP
- Please do not close this window. The "terminal" mentioned later refers to this window (if you closed the window, please go back to step 2)
- If you use PowerShell or Linux/Mac, all
adbshould be replaced with./adb
# Setting adb
To use adb you first need to turn on USB debugging on your device, usually by following these steps:
Open system Settings and go to About.
Click "Build number" quickly for several times, you can see a message similar to "You are a developer".
At this point, you should able to find "Developer Options" in Settings, enable "USB Debugging".
Connect the device to the computer and type
adb devicesin the terminal.At this time, the dialog "Allow debugging" will appear on the device, check "Always allow" and confirm.
Enter
adb devicesagain in the terminal. If there is no problem, you will see something like the following.List of devices attached XXX device
TIP
The steps for enabling Developer Options on different devices may vary, please search for yourself.
# Start Shizuku
Copy the command and paste into the terminal. If there is no problem, you will see that Shizuku has started successfully in Shizuku app.
Command for Shizuku v11.2.0+
adb shell sh /sdcard/Android/data/moe.shizuku.privileged.api/start.sh
# FAQ
Many manufacturers have made modifications to the Android system that prevent Shizuku from working properly.
# Start via wireless debugging: keeps showing "Searching for pairing service"
Please allow Shizuku to run in the background.
Searching for pairing service requires access to the local network, and many manufacturers disable network access for apps as soon as they become invisible. You can search the web for how to allow apps to run in the background on your device.
# Start via wireless debugging: immediately fail after tapping "Enter pairing code"
# MIUI (Xiaomi, POCO)
Switch notification style to "Android" from "Notification" - "Notification shade" in system settings.
# Start via wireless debugging/Start by connecting to a computer: the permission of adb is limited
# MIUI (Xiaomi, POCO)
Enable "USB debugging (Security options)" in "Developer options". Note that this is a separate option from "USB debugging".
# ColorOS (OPPO & OnePlus)
Disable "Permission monitoring" in "Developer options".
# Flyme (Meizu)
Disable "Flyme payment protection" in "Developer options".
# Start via wireless debugging/Start by connecting to a computer: Shizuku randomly stops
# All devices
Make sure Shizuku can run in the background.
Do not disable "USB debugging" and "Developer options".
Change the USB usage mode to "Charge only" in the "Developer options".
On Android 8, the option is "Select USB configuration" - "Charge only".
On Android 9+, the option is "Default USB configuration" - "No data transfer".
(Android 11+) Enable "Disable adb authorization timeout" option
# EMUI (Huawei)
Enable "Allow ADB debugging options in 'Charge only' mode" in "Developer options".
# MIUI (Xiaomi, POCO)
Do not use the scan feature in MIUI's "Security" app, since it will disable "Developer options".
# Sony
Don't click the dialog shows after connecting the USB, because it will change USB usage mode.
# Start via root: cannot start on boot
Please allow Shizuku to run in the background.